Service
 Service
Service

3. Response time and response method: During the warranty period, if the equipment malfunctions, we will arrive at the customer's repair site within 8 hours locally and within 24 hours for other provinces after receiving the user's repair request. If the equipment cannot be used normally after multiple repairs due to performance issues during the warranty period, we will replace it with a new device free of charge. After the warranty period, if the product malfunctions, we can send a technical support engineer for free on-site service. If parts need to be replaced, they will be supplied at the most favorable market prices. We have resident technical support engineers in many locations across the country to respond to related needs promptly.
4. Service working hours: For all products supplied, we adhere to 24/7 service, every day of the work.

Add: No. 1508, Xiangjiang Road, High-tech Zone, Suzhou City, Jiangsu Province, China
Q&A
Q&A
Q&A
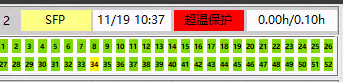
Cause analysis
1. The setting value of product temperature protection value in parameter setting is too low;
2. The temperature sensor on the aging daughter board is abnormal;
3. Abnormal temperature control of temperature box;
Solution
1. Set the product temperature protection value in the parameter setting to the normal value range.
2. Check the temperature consistency of other temperature sensors on the aging daughter board and check the abnormality of the temperature sensor.
3. Check the causes of abnormal temperature control of the temperature box, such as whether the electronic sealing valve is opened, whether the solid-state relay is melted and the output end is in a long-term on state.
Service hotline
Follow
Name
Email verfication code
Phone
Password
Confirm Password
e-mail address
Email verification code
New Password
Confirm Password


